If you've just ordered a new WPhost Managed WordPress Hosting Plan, then migrating your site to WPhost couldn’t be easier. Sit back and relax knowing we’ll take care of the transfer. No matter how many sites you have, we’ll migrate your WordPress sites for free.
One question we sometimes get is, “Can I migrate my site to WPhost myself?” and the answer is yes but why would you want to when we'll do it for you! We’d love to move your site over to WPhost for free, but if you are adamant you'll do-it-yourself and accept the risks of doing so, this article is for you.
NOTE
- This guide covers migrating a site to WPhost from another host or any live server (including an existing WPhost site) using the All-in-One WP Migration plugin.
- If your site exists solely on your local machine, we suggest downloading a backup of your site using the free BackWPup plugin and sharing this file with us for import.
How can I manually run a WordPress backup myself?
Install and activate the free All-in-One WP Migration plugin
Log into your current site at your current host, and head over to Plugins > Add New.
In the search field on the plugin install screen, enter “All-in-One WP Migration” and click Install Now. Alternatively, you can download the plugin from the WordPress plugin directory and install it manually.
Once installed, click Activate.
Let the export begin!
IMPORTANT
- Before proceeding with your export, first uninstall any Limit Login Attempts plugins. These plugins are known to create errors during the WPhost import process.
Once activated, head back to your WordPress dashboard and click the All-in-One WP Migration button on the left sidebar.
Click Advanced options to expand the options and select:
- Do not export spam comments
- Do not export post revisions
- Do not export must-use plugins (files)
- Do not replace email domain (sql)
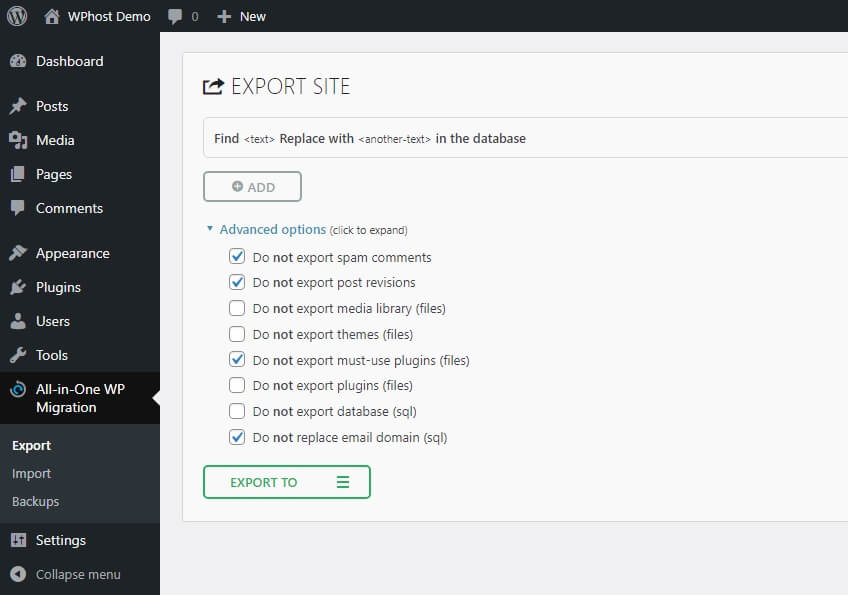
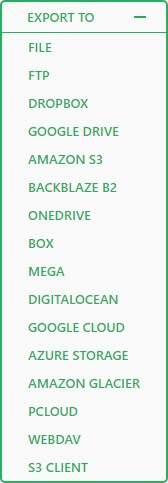
Click EXPORT TO > FILE to start the export process.
Importing your site
Once the export is complete, log into the new site at WPhost.
Install the All-in-One WP Migration plugin from the WordPress.org plugin directory. Alternatively, you can download the plugin from the WordPress plugin directory and install it manually.
Once installed, click Activate.
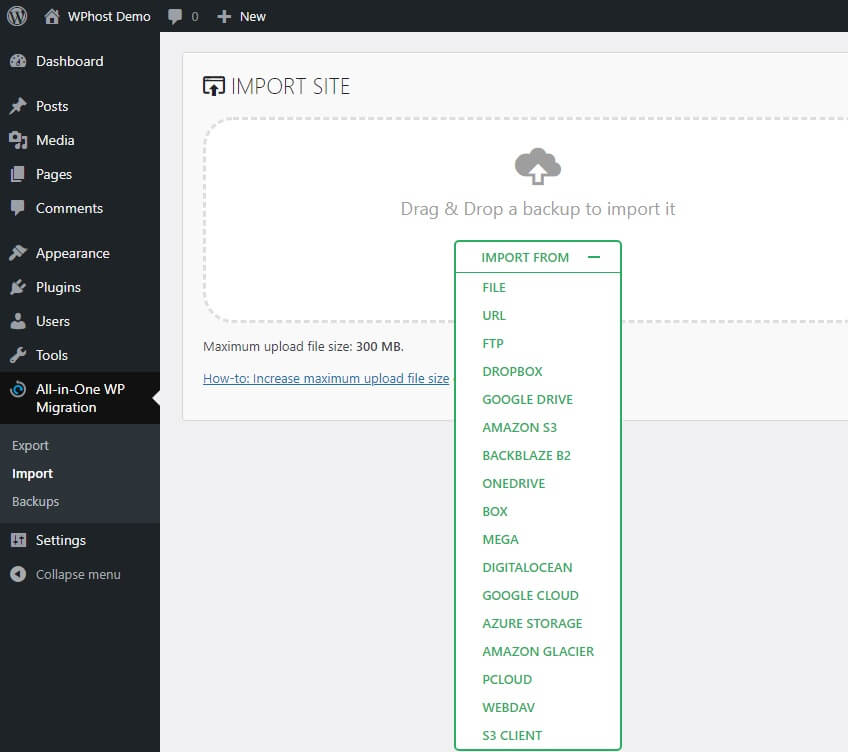
Go to All-in-One WP Migration > Import.
Click IMPORT FROM > FILE and choose the export file named for the site you created above.
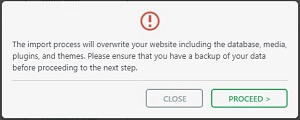
The import process will run through some checks and begin the import. When the prompt appears to overwrite the existing site, click PROCEED.
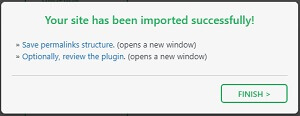
When the import completes and you see the “imported successfully” notification, click the FINISH button.
Review your migrated site
Once the migration has wrapped up, click through the destination WPhost-hosted site and review your migrated site.
Finishing up
- Now that the import is complete, head back to the Plugins page in the dashboard, then deactivate & remove the All-in-One WP Migration plugin you installed above.
- If any caching plugins are in use on the site, WPhost handles caching at the server level, eliminating the need for caching plugins.
- Because sites may use various themes and/or page builders, you may need to spend a little time determining if any settings in themes and/or plugins need to be adjusted after the import.
Take your migrated site live
When you’re ready to take your site live, just open a support ticket so we ensure the launch goes smoothly.
